VENUS E 3.0 installation guide
This guide follows the MARSTEK VENUS-E user manual (Philippine edition, model MST-BIE5-2500). It is meant for Silvera Solar Power staff, dealers and installers who need a clear, step-by-step overview before going on site. Read the full manual before you start. This page does not replace it.
The manual states: "Only qualified professionals or properly trained personnel are allowed to install, operate, or maintain this equipment." It also says not to power on the equipment until it has been correctly installed or checked by a professional, and that maintenance must only be done by authorised personnel. You also need approval from the local utility before running in grid-tied mode. Customers should not install this unit themselves.
What the VENUS E 3.0 is
The manual describes the VENUS-E as an AC-coupled energy storage system with three working modes: AI Optimization, Self-Consumption and Manual. It can charge from the grid and supply power to both the grid and household loads. Mode setup is covered in VENUS E app and working modes.
| Item | Value (Philippine-edition manual) |
|---|---|
| Model | MST-BIE5-2500 (5 = 5 kWh, 2500 = 2500 W maximum output power) |
| Battery | 5120 Wh, 51.2 V, 100 Ah, LiFePO4, 90% DoD |
| Dimensions | 480 × 153 × 624 mm |
| Weight | 55 ± 0.5 kg |
| Grid | 220 V, 60 Hz, range 198–242 V, L/N/PE |
| BACKUP (off-grid) output | 2.5 kVA rated, 3.5 kVA for 10 s |
| On-grid rated power | 0.8 kW (default) / 2.5 kW (*Premium) |
| Ingress protection | IP65, natural convection cooling |
| Max. operating altitude | 2000 m |
| On-grid AC connection | Three-wire household plug (Euro 16A) |
| Communication | Wi-Fi & RS-485 (waterproof aviation plug) |
The VENUS E 3.0 datasheet lists 230 V / 50 Hz, a grid range of 187–253 V and a weight of 60 ± 0.5 kg. The Philippine-edition manual (MST-BIE5-2500) lists 220 V / 60 Hz, 198–242 V, rated grid current 11.36 A and 55 ± 0.5 kg. The Philippine grid is 220 V / 60 Hz, so this page uses the Philippine-manual values for PH units. Check the rating label on the actual unit before installing.
The manual lists on-grid rated power as 0.8 kW by default and 2.5 kW as "*Premium", with the footnote: "Enabling this function must comply with local regulations and should only be performed by authorized personnel!" Do not promise 2.5 kW export to a customer unless it is confirmed and compliant.
Before you go on site
Pre-installation checklist
Per manual section 2.1:
- Before unpacking, inspect the packaging for visible damage such as holes, cracks or other signs of internal issues. Check the model number.
- If the packaging is damaged or the model number does not match, do not unpack. Contact the dealer immediately.
- After unpacking, check the device for dents, scratches or other surface defects.
- Check every item against the packing list. For damage or missing items, contact the dealer or email [email protected] (as printed in the manual).
Selecting the installation site
Per manual section 2.2:
- Orientation: the unit must stand upright. Do not tilt it forward, backward or sideways, and never lay it flat or upside down.
- Preferred surfaces: solid brick-concrete structures, concrete walls or floors.
- Alternative surfaces (e.g. drywall, wood) must:
- be as flame-retardant as possible;
- meet the equipment's load-bearing requirements;
- if not, have no flammable or explosive items anywhere in the installation environment.
- Clearance: keep clear space around the unit for heat dissipation and safety isolation. Do not place other equipment nearby.
- Prohibited nearby: other equipment (except VENUS-compatible devices and approved awnings), and flammable or explosive materials.
The safety chapter adds: install in a dry, well-ventilated area away from liquids, never block ventilation openings, and do not install near flammable or explosive gas or smoke.
Accessories and tools
| Required accessories (from packing list) | Recommended tools |
|---|---|
| AC cable × 1 | Screwdrivers |
| Unit-side mounting bracket × 1 | Wrench |
| Wall-side mounting bracket × 1 | Diagonal pliers |
| Insulating gloves | |
| Measuring tape |
If any accessory is missing or damaged, contact your supplier before you continue.
Installation steps
The manual says to make sure power is off before installation and not to install or remove cables while the power is on. Remove watches, rings and other conductive jewellery, and use insulated tools.
(Optional) Attach the unit-side mounting bracket
Needed: VENUS-E unit, unit-side mounting bracket, screws, screwdriver.
Line up the screw holes on the unit-side bracket with the mounting points on both sides of the device. Fasten the bracket with the screws provided.
(Optional) Mount on the wall
Needed: VENUS-E unit, wall-side mounting bracket, screws, screwdriver.
Screw the wall-side bracket to the wall, then hook the two brackets together. The unit is now firmly wall-mounted.
Steps 1 and 2 are optional. The manual also allows floor installation, as long as the unit stays upright.
Open the cover
Needed: VENUS-E unit.
Open the cover before wiring.
Connect Grid and BACKUP
Needed: VENUS-E unit, the AC cable provided, the home load.
- Grid socket: plug the cylinder-shaped end of the AC cable into the VENUS device. Plug the other end into a household power socket (city grid).
- BACKUP socket: plug the home-load wiring into the BACKUP socket.
The manual warns: "DO NOT connect both the Grid and BACKUP sockets of the MARSTEK VENUS-E device to the city power network. Doing so will cause a circuit break or possible device damage."
The manual says wrong wiring can cause:
- short circuits from voltage/current anomalies;
- system failures from current backflow or incompatible configuration;
- serious safety hazards, including fire.
The Grid socket goes to the utility supply. The BACKUP socket feeds only the loads you want powered during a brownout. It must never be connected back to the utility.
Further electrical rules from the manual:
- Put a circuit breaker on each branch line. A central protective device is not needed.
- Check local electrical regulations for how many VENUS units can be connected on each branch circuit (spec-table note 2).
- For grounded equipment, connect the ground cable first when installing and remove it last when removing.
- All electrical connections must comply with local electrical codes. Get utility approval before grid-tied operation.
Interface and LED indicators
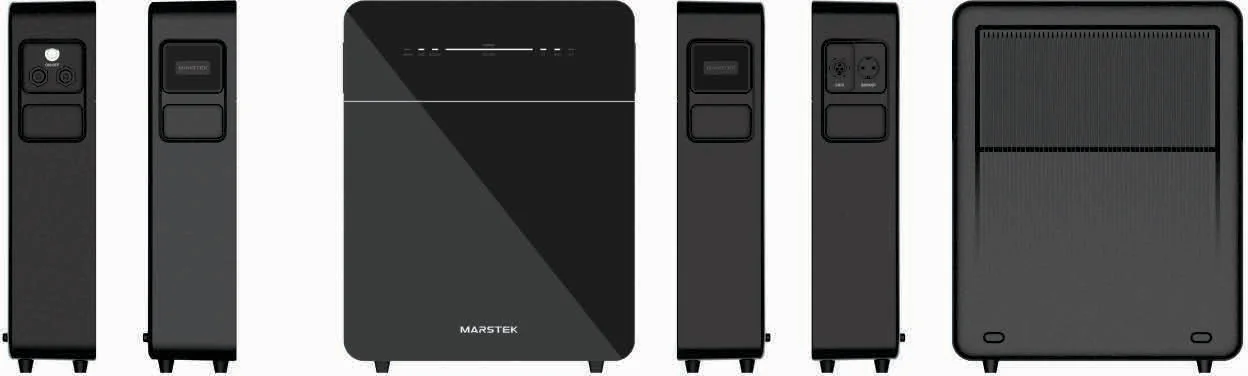
Ports (manual section 1.4)
| Label | Port | Function |
|---|---|---|
| A | RS485 | RS-485 protocol communication socket |
| B | On/Off button | Press to turn on / off |
| C | LAN | Wired network connection port |
| D | Grid | Connects the system to the household grid |
| E | BACKUP | AC socket that powers loads during electricity outages |
Front LED indicators (manual section 1.5)
| # | Indicator | Meaning |
|---|---|---|
| 1 | Error | Fault indicator |
| 2 | Grid | Grid socket on |
| 3 | BACKUP | BACKUP socket on |
| 4 | Capacity | Battery level. Flashes left→right when charging, right→left when discharging |
| 5 | CT | Current transformer connected |
| 6 | WiFi | Wi-Fi connected |
| 7 | BT | Bluetooth connected |
| Indicator group | Status | Meaning |
|---|---|---|
| Battery | Off | Power off |
| Battery | Steady on | Power on |
| Battery | Light bar left → right | Charging |
| Battery | Light bar right → left | Discharging |
| Warn | Off | Operating normally |
| Warn | Red light on | Device fault (see VENUS E troubleshooting) |
| Others | Off | Function off |
| Others | Steady on | Function on |
System layouts
The manual (section 1.8) shows two typical household setups.
Plug-in solution (with any solar)
The manual says the VENUS-E is compatible with all photovoltaic systems, enabling self-consumption and AI-based optimization. The diagram shows:
- solar panels → any solar inverter → main panel → home loads and grid (through the meter);
- a MARSTEK CT002 at the main panel measuring grid power;
- the VENUS-E plugged into the household circuit. It talks to an optional external EMS over RS485 / Wi-Fi / BT;
- the diagram labels the result "Anti Feed-in" and "100% Self-consumption Guaranteed".
Self-Consumption mode requires a CT (or one of the compatible meters). See the CT002 smart meter page and the meter list in VENUS E app and working modes.
Whole-house BACKUP solution (with SmartBox)
The VENUS-E can work with the MARSTEK SmartBox to provide whole-home BACKUP power. The diagram shows: Grid → main panel (with MARSTEK CT002) → Single-Phase SmartBox → home BACKUP loads, with the VENUS-E units on an on-grid line and a BACKUP line.
The VENUS-E manual only shows the SmartBox in this diagram. It gives no SmartBox wiring, ratings or part numbers. Do not quote SmartBox specifications or prices until Silvera Solar Power confirms them from a SmartBox source document.
Routine maintenance
From manual section 4.1:
- Maintenance should only be done by authorised personnel, wearing personal protective equipment.
- Keep the operating environment within the specifications, and do not expose the unit to severe weather.
- If the device has problems, do not use it until they are solved.
- Check the unit at least once a year. Make sure every component is in good condition and the heat-dissipation parts are not blocked.
- Cleaning: use a vacuum cleaner or a special brush. Do not use rags made from filamentous or corrosive materials, because they can cause static or corrosion.
- Disconnect before servicing: unless otherwise specified, unplug the device from the socket before any maintenance or repair.
- Do not dismantle: users must not repair internal parts.
- AC output harness: the AC output harness (AC tapping cable) must not be replaced. If its wires are damaged, the entire device must be scrapped.
- Repairs: do not repair the product yourself. Always use qualified parts.
For fault codes and what to do about them, see VENUS E troubleshooting.
Related pages
- VENUS E 3.0 product page
- VENUS E app and working modes
- VENUS E troubleshooting and error codes
- CT002 smart meter
Sources
- VENUS E 3.0 user manual, Philippine edition MST-BIE5-2500 (Drive): primary source for this page
- VENUS E 3.0 datasheet (Drive): used only for the source-conflict note